The SMS Sendout feature allows you to create and send SMS campaigns directly from our CDP, if you do not already have another Marketing Automation tool and want to create SMS campaigns in an easy and user-friendly way. In four easy steps, you can create your SMS campaigns, define which segment you want to target, personalize it and see the immediate effects of real-time targeting.
You’ll be able to reap the benefits of your data and target your SMS campaigns to granular audiences, and for instance target them with relevant offers and personal communication, such as wishing happy birthday!
How it works #
This guide will guide you step by step through the SMS Sendout feature and how you can use it to create and send SMS campaigns with high ROI in an easy way.
Navigating the SMS Sendout List #
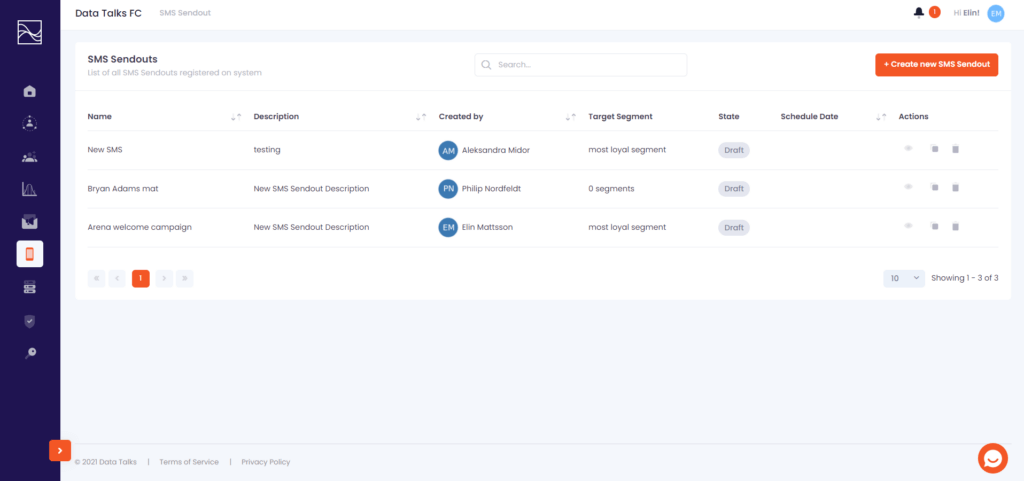
- Click the SMS icon on the left-hand side menu and you will be directed to the the SMS Sendout List page, where you are able to view the following:
- The SMS Sendout List displays all of your SMS Sendouts created regardless of state (draft, sent etc).
- You can also see basic information about the SMS campaigns such as Name, Description, who it was created by, which segment it is aimed for, state, if it’s scheduled etc.
- You can delete your SMS Sendouts by clicking the trashcan icon on the right hand side under ‘Actions’.
How to create a new SMS Sendout #
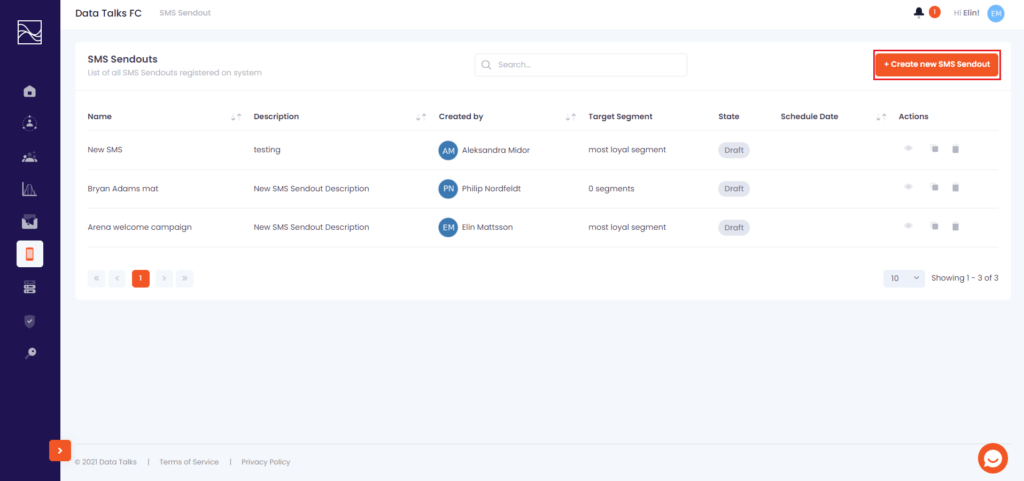
- Click the ‘Create new SMS Sendout’ button in the upper right corner.
- You will then be directed to this page, where you can create your SMS campaign.
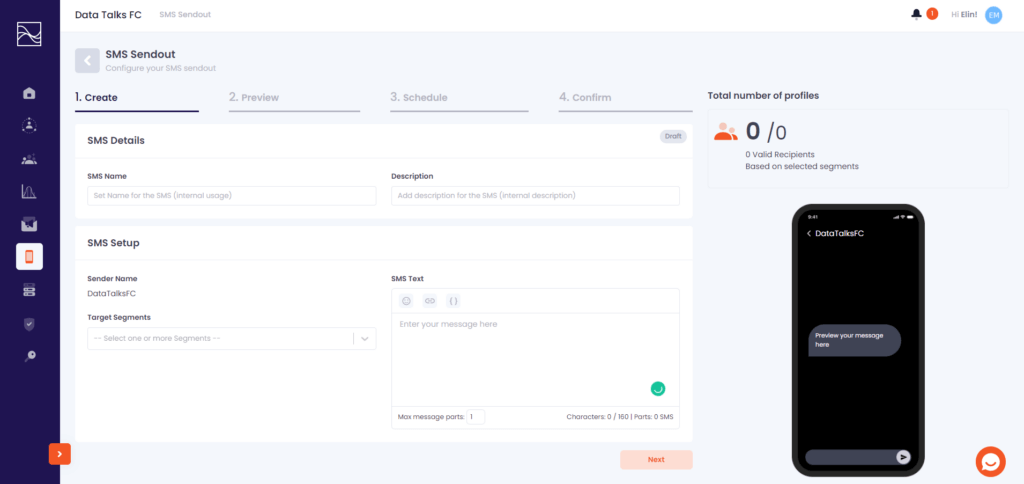
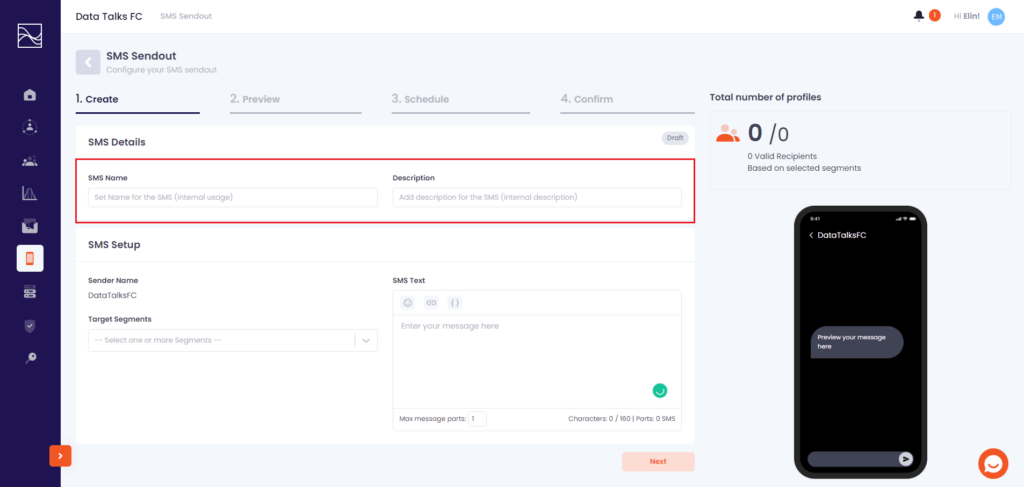
- First, you need to decide the SMS campaign’s name and add a description, both only visible internally to you and your colleagues.
- Second, you need to provide the following details:
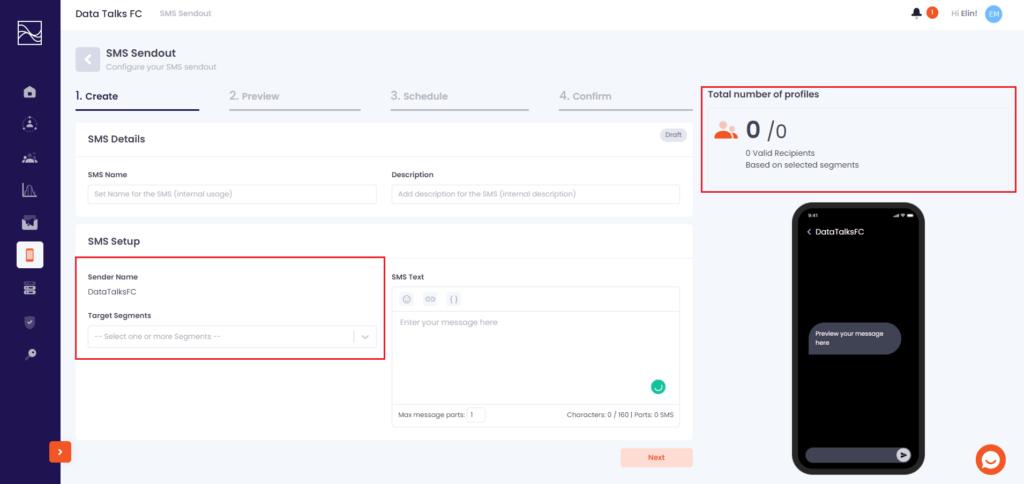
- Sender Name: This will appear as the sender of the SMS when you send the campaign. NOTE: It can maximum be 11 characters (spaces included).
- Target Segments: Here you will select which segment(s) you want to target your SMS campaign to. You can choose more than one segment if you want. When you add the segment(s) you will see how many recipients the SMS campaign will be sent to, as marked below.
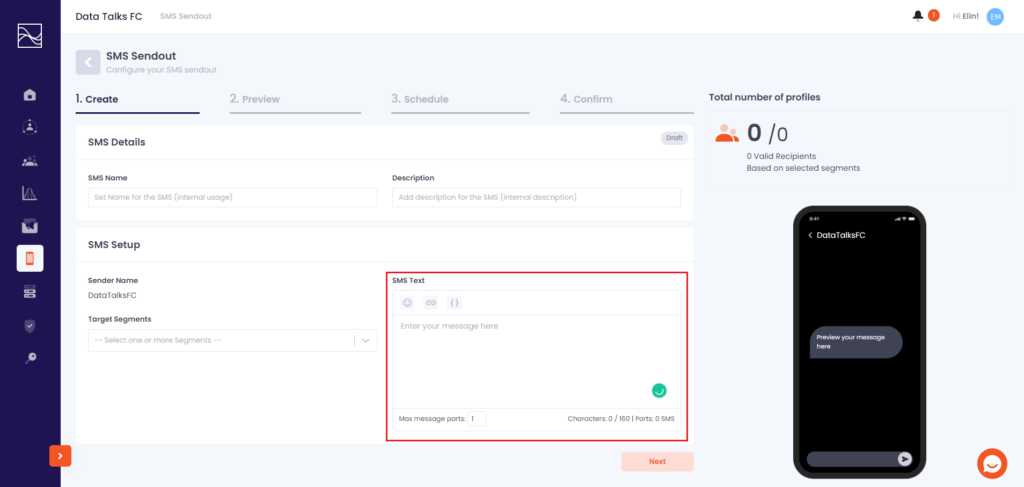
- Finally, in the last step you need to define what the SMS in your campaign should contain in the SMS Text box. Here you write in free text what you want your SMS to say. There are a few options you can use to make your SMS campaign more personalized and fun in the upper panel, described in the steps below.
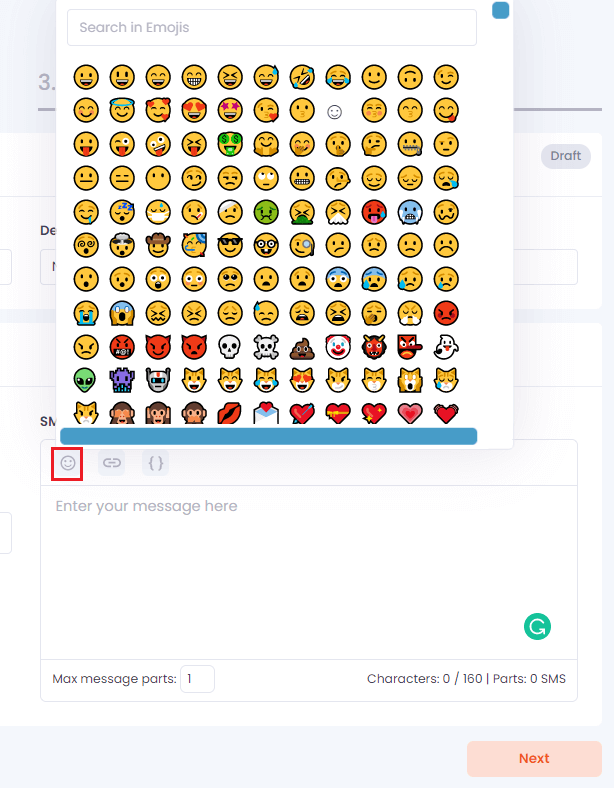
- Emoji Library: By clicking the ‘Emoji’ icon you can add a range of emoticons in your SMS, making it more fun and visually appealing. Simply click the Emoji you want to add and it will appear in the SMS Text box.
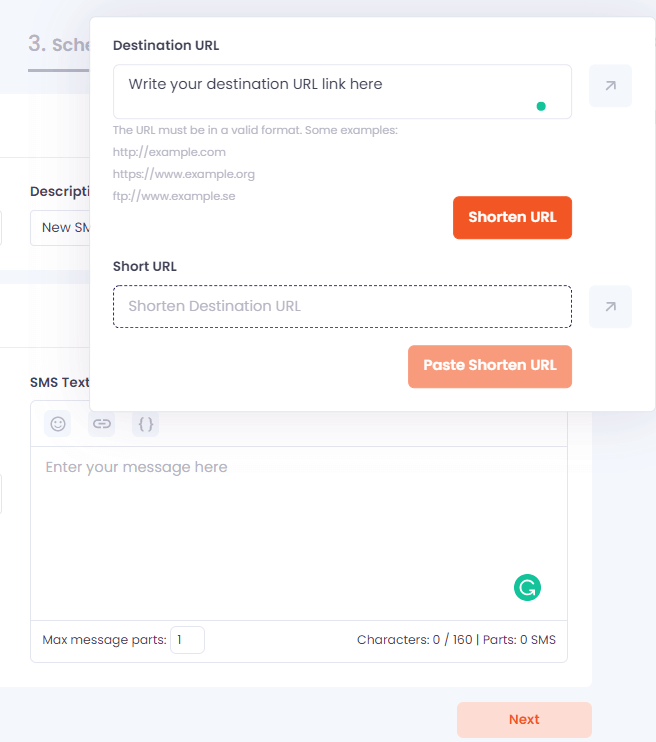
- Link Shortener: If you want to include a link in your sms you can use the URL shortener to shorten your link by clicking on the link symbol. The pop-up below will appear where you type in your destination URL and click the ‘Shorten link’ button. The shortened link will appear in the Short URL text box, and by clicking the ‘Paste Shorten URL’ button the shortened link will appear in the SMS Text box.
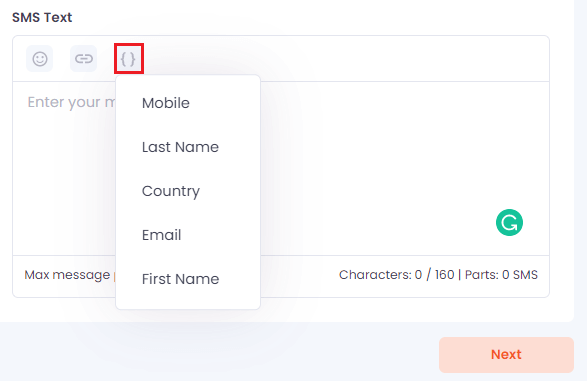
- Personalization fields: You can also add personalization fields by clicking the personalization icon. Then you will see which personalization fields are available to you and simply click the one you want to add, and it will appear in the SMS Text box.
- Remember that you can get a sneak peak of what the SMS will look like in the mobile phone to the right. NOTE: The personalization fields will not appear here since they are dynamic, which is why we encourage to send a proper preview of your SMS campaign to yourself.
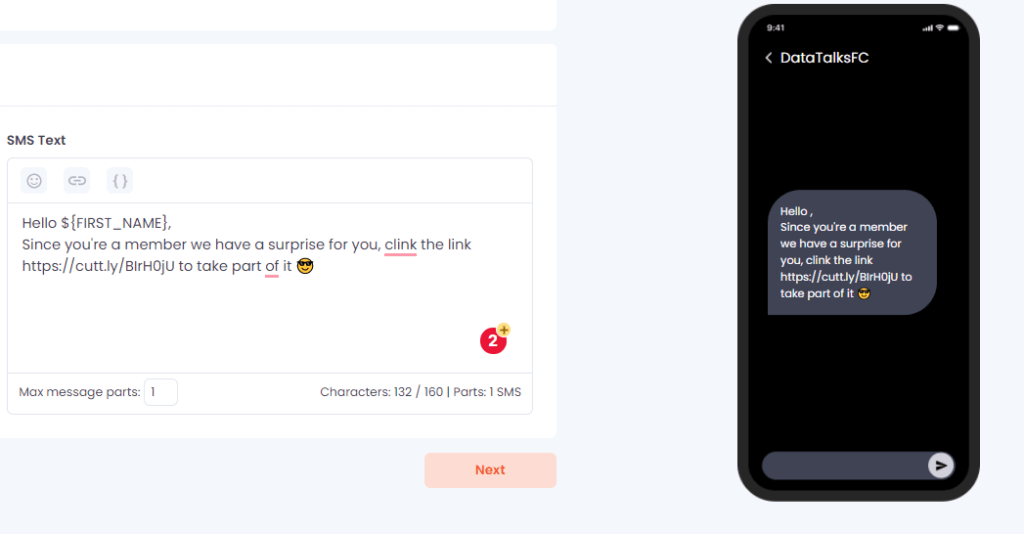
- NOTE: At the very bottom of the SMS Text box, you can see:
- Max. message parts: Default is 1.
- Characters count & Parts: for more information on SMS character limitation, read this page.
- When you have decided the content in the SMS and added any emojis or personalization that you want, you can proceed to the next steep by clicking Next.
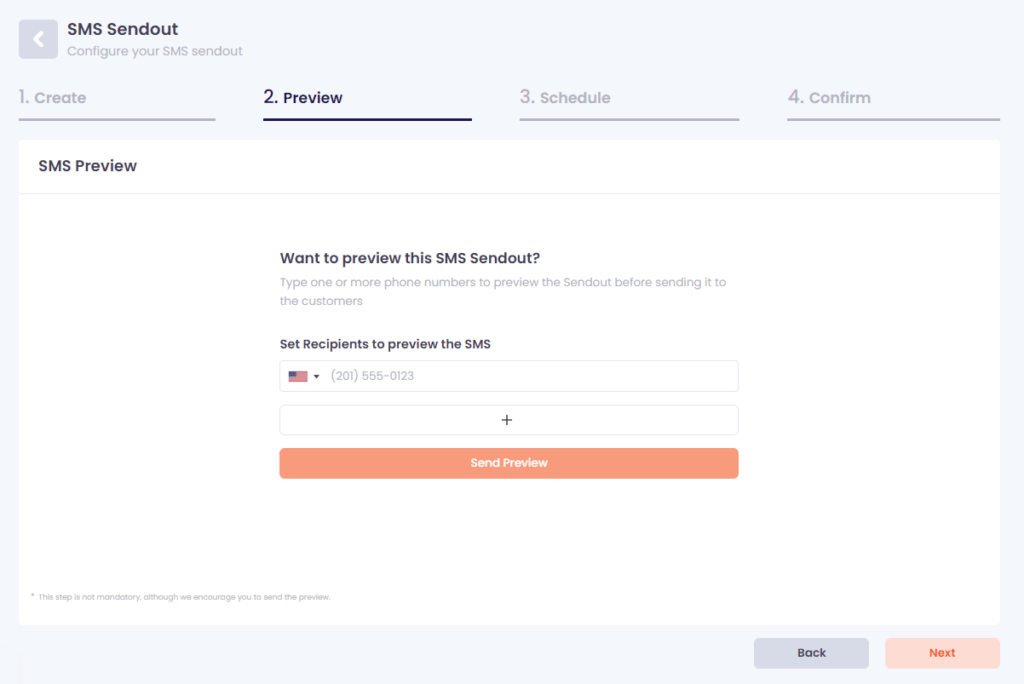
- The next step is to Preview your SMS campaign before sending it. Simply write your phone number and/or the phone numbers that should receive the preview. Click Send Preview and wait for the SMS to arrive. If you want to edit your SMS, go back to the Create step, and if you’re happy and ready to send your campaign – click Next.
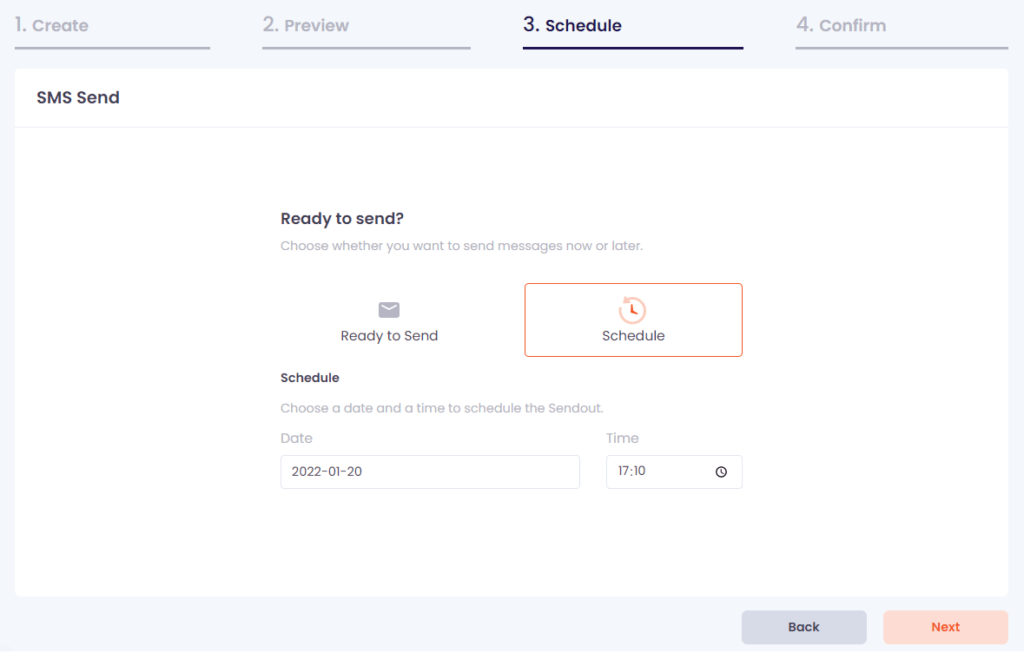
- Next, you need to determine if you are going to send your SMS campaign right away, or if you want to schedule it for later. You have two options:
- Ready to send: Click Ready to send to send your Campaign right away, after you confirm the campaign in the final step. Click Next to proceed.
- Schedule: Click Schedule and you need to fill in the date and time. Click Next to proceed.
- Finally, in the last Confirm step of the process you will get an overview of your campaign, including how many the campaign will be sent to, if there are any duplicate or invalid phone numbers and how many SMS parts will be sent.
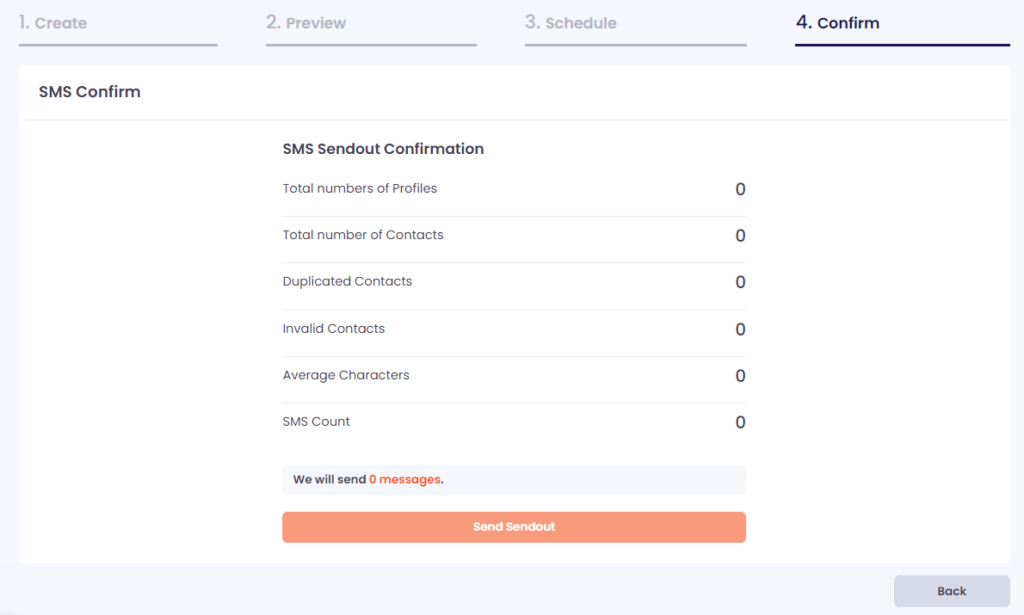
- Click “Send Sendout” or “Schedule Sendout” depending on which option you chose, and you’re all done.